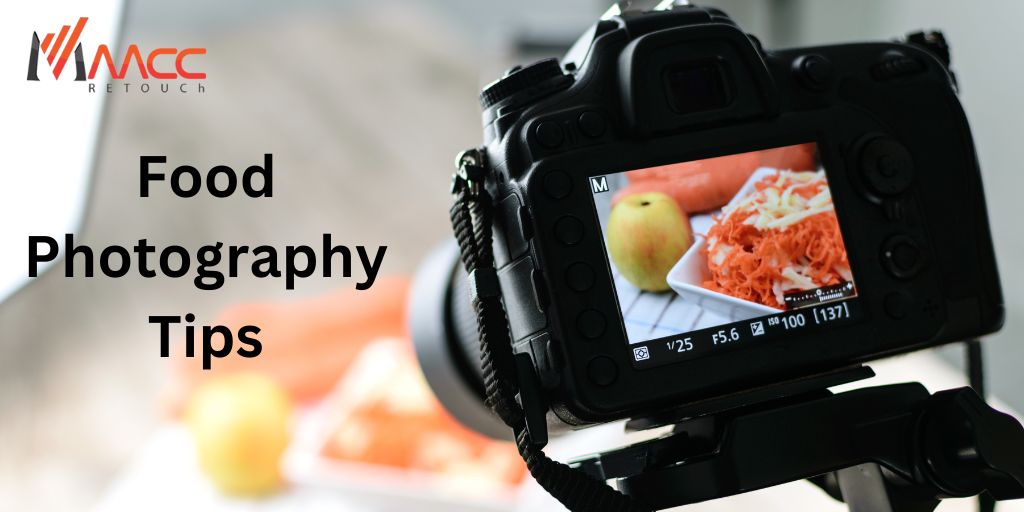
Embarking on a culinary journey through the lens demands more than just a click – it requires an artful approach. These “15 Essential Food Photography Tips” serve as a savory guide, unveiling the secrets to capturing gastronomic delights in a way that not only satisfies the eyes but also whets the appetite.
Whether you’re a budding food entrepreneur or an avid foodie with a passion for photography, these tips delve into the nuances of composition, lighting, and styling, empowering you to transform your culinary creations into visual feasts.
From perfecting the art of plating to mastering the play of light and shadow, this comprehensive guide is your key ingredient for creating stunning food photography that tells a delicious story.
What is Food Photography?

Food photography is a specialized genre of commercial photography that focuses specifically on capturing visually appealing and appetizing images of food. Its purpose is to showcase food in the most enticing way possible, whether it’s for advertising, menus, cookbooks, social media, or any other platform where food is promoted.
Moreover, food photography aims to evoke an emotional response from viewers, making them crave the dish and encouraging them to try it or engage with the brand. Photographing food requires attention to detail, careful styling, lighting techniques, and sometimes post-processing to enhance the colors and textures of the food. The ultimate goal is to create images that make the viewer’s mouth water and convey the taste, aroma, and overall experience of the food through visual representation.
15 Food Photography Tips for Your Business
Whether you’re an aspiring food photographer or simply want to capture stunning images of your culinary creations, this collection of 15 expert tips will help you master the art of food photography. From lighting techniques and composition guidelines to prop selection and post-processing tips, we have you covered.
Elevate your food photography skills and learn how to create visually enticing images that will make mouths water and eyes linger. Join us as we delve into the world of food product photography and unlock the secrets to capturing the perfect shot. Let’s get started on this delicious journey!
1. Lighting
The right lighting can make or break your food photography. Natural light is ideal, so shoot near a window or outside during the day. Avoid harsh direct sunlight, as it can create harsh shadows. Diffuse the light with sheer curtains or use a reflector to bounce light onto the subject.
2. Props and Styling
Choose props and backgrounds that complement the food and create an appealing composition. Experiment with different textures, colours, and arrangements to add visual interest to your shot. Keep the focus on the food by using simple and minimalistic props.
3. Composition
Apply the rule of thirds to create a visually pleasing composition. Arrange the food and props off-centre for a more dynamic shot. Consider the lines, curves, and shapes within the frame, and use them to guide the viewer’s eye to the focal point.
4. Camera Angle

Try shooting from different angles to find the most flattering perspective for the food. The popular angles include a straight-on overhead shot (top-down), a 45-degree angle, or a close-up detail shot. Each angle can highlight different aspects and textures of the food.
5. Depth of Field
Experiment with depth of field to create a desired focus and blur effect. A shallow depth of field (wide aperture) can isolate the subject and create a dreamy look, while a deep depth of field (narrow aperture) can keep more of the scene in focus.
6. Props and Garnishes
Use props, garnishes, and sauces strategically to enhance the visual appeal of the food. Fresh herbs, drizzles of sauce, and colourful garnishes can bring life to the dish and create a more appetizing image.
7. Camera Settings
Shoot in manual mode to have better control over exposure. Adjust the ISO, aperture, and shutter speed accordingly. Use a tripod to minimize camera shake and ensure sharp images.
8. White Balance

Correct white balance to ensure accurate colour representation. Either set a custom white balance or adjust it during post-processing. Neutral colours like gray cards can be useful references for accurate white balancing.
9. Negative Space
Leave empty space around the food to create a balanced composition. Negative space helps draw attention to the subject and gives the image a clean and professional look.
10. Focus and Sharpness
Ensure precise focus on the food. Use manual focus or single-point autofocus to control what is in focus. Take multiple shots with different focus points to maximize sharpness.
11. Editing and Post-processing
Use photo editing software to refine your images. Adjust brightness, contrast, and color balance, but be careful not to overdo it. Retouch any imperfections, remove distractions, and enhance details to create a polished final image.
12. Experimentation
Don’t be afraid to try new angles, props, or lighting techniques. Explore different styles and aesthetics to find your unique voice in food photography. Experimentation leads to growth and can help you develop your own signature style.
13. Storytelling
Consider the context and story behind the food. Capture images that evoke a sense of mood, culture, or nostalgia. Incorporate elements that enhance the narrative and create a connection with the viewer.
14. Backgrounds and Textures
Experiment with different backgrounds and textures to add depth and interest to your images. Wooden boards, marble surfaces, or patterned fabrics can provide a beautiful backdrop that complements the food.
15. Practice and Patience
Like any skill, food photography takes practice and patience. Keep shooting, experimenting, and learning from your experiences. Develop your style and continuously strive to improve. Remember, each shot is an opportunity for growth and creativity.
By implementing these tips, you can elevate your food photography and create stunning, mouth-watering images that captivate viewers and entice them to indulge in the culinary delights you capture.
How to take pictures of food?

Taking captivating pictures of food requires attention to detail, composition, lighting, and styling. Follow these steps to capture mouthwatering images of your culinary creations:
- Plan your shot: Decide on the concept and style you want to achieve. Consider the mood, angles, props, and composition that will best showcase the food.
- Gather props and ingredients: Choose appropriate plates, utensils, napkins, and garnishes that complement the food and add visual interest.
- Set up the scene: Find a well-lit area near a window or use artificial lights to create soft, diffused lighting. Avoid harsh shadows and direct sunlight. Clear any distracting clutter from the background.
- Styling the food: Arrange the food and props to create an appealing composition. Use the rule of thirds, balance colours and shapes, and create depth. Experiment with different arrangements until you find the most enticing presentation.
- Choose the right camera and lens: Use a DSLR or mirrorless camera for better control and image quality. A macro lens or a lens with a focal length between 35mm to 50mm is ideal for food photography.
- Adjust camera settings: Shoot in manual mode to optimize control over exposure. Set a low ISO for minimal digital noise. Experiment with aperture settings to control the depth of field. Use a tripod to ensure steady shots.
- Focus on details: Pay attention to the food’s textures and details. Use manual focus or autofocus (single-point) to ensure sharpness on the desired area. Consider a shallow depth of field to create selective focus.
- Experiment with angles: Capture the food from various angles to find the most flattering perspective. Explore top-down (flat lay), 45-degree, and eye-level angles. Each angle can accentuate different aspects of the dish.
- Play with depth of field: Adjust the aperture to control depth of field. A wider aperture (small f-number) creates a shallow depth of field, blurring the background and drawing focus to the food.
- Fine-tune exposure: Use the camera’s histogram and adjust exposure compensation to ensure accurate exposure. Avoid overexposed or underexposed images.
- Add human touch: Consider incorporating hands or people in the frame to add a sense of interaction and authenticity. It can help to tell a story or convey the experience of enjoying the food.
- Capture different shots: Take a variety of shots from different angles, zoom levels, and compositions. Experiment with close-ups, wide shots, and detail shots.
- Edit and enhance: After your shoot, import the images onto a computer and use photo editing software to refine the images further. Adjust exposure, contrast, colors, and sharpness. Remove any distractions or imperfections.
- Maintain authenticity: While editing can enhance the image, aim for a natural and realistic representation of the food. Avoid overly saturating colors or altering the appearance drastically.
- Practice and experiment: Like any skill, improving food photography requires practice. Explore different styles, compositions, and lighting setups. Continuously refine your technique and develop your unique style.
By following these steps, you’ll be able to capture stunning images that showcase the beauty and taste of your culinary creations through the lens. Enjoy the process and have fun experimenting with different techniques to unleash your creative vision!
Must-Have Equipment for Food Product Photography

Food photography is not just about showcasing appetizing dishes but also telling stories and invoking emotions through imagery. In this guide, we will provide you with essential tips, techniques, and insights on how to capture stunning food photographs that entice taste buds and draw viewers in.
- Camera: Investing in a high-quality camera is essential for capturing stunning food images. Look for a DSLR or mirrorless camera with manual controls that allow you to adjust settings such as aperture, shutter speed, and ISO. A camera with good low-light performance and a high-resolution sensor will ensure crisp and detailed shots.
- Lens: A prime lens with a focal length of around 50mm or 35mm is a great choice for food photography. These lenses offer versatility and capture a natural perspective, making them suitable for a wide range of compositions. Consider investing in a macro lens if you want to highlight intricate details and textures in close-up shots.
- Tripod: A sturdy tripod is essential for keeping your camera stable and eliminating any blurriness caused by camera shake. Look for a tripod that is adjustable in height and provides stability, so you can experiment with different angles and compositions without worrying about movement.
- Lighting: While natural light is ideal, having control over artificial lighting is crucial. Invest in continuous lights or a speedlight/flash setup to have greater control over the intensity and direction of light. This will enable you to create the desired mood and highlight the food’s textures and details effectively.
- Diffuser: When working with artificial lighting or shooting in direct sunlight, a diffuser helps soften and diffuse the light, reducing harsh shadows and creating a more pleasing, even illumination across the food. Look for a translucent panel or collapsible diffuser that fits your lighting setup.
- Reflectors: Reflectors are invaluable for bouncing light back onto the subject, filling in shadows, and creating a more balanced lighting setup. Silver, gold, and white reflectors are commonly used to manipulate the quality and direction of light, allowing you to achieve the desired look.
- Backgrounds and Props: Having a variety of backgrounds and props can greatly enhance the composition and visual appeal of your food images. Consider using textured surfaces like wooden boards, marble slabs, or patterned fabrics as backgrounds. Additionally, carefully select plates, utensils, napkins, and other props to complement the food and add interest to the scene.
- Food Styling Tools: Tweezers, brushes, and droppers are essential tools for food styling. They allow you to arrange and place garnishes, sauces, and other elements with precision, creating a visually appealing and appetizing presentation.
- Memory Cards and Batteries: Ensure you have sufficient storage space by having high-capacity memory cards. It’s also important to carry extra batteries or battery packs to avoid interruptions during extended photo shoots.
- Editing Software: Enhance and refine your images with photo editing software such as Adobe Lightroom or Photoshop. These tools allow you to make adjustments to exposure, colour temperature, white balance, and more, ensuring your food images look their absolute best.
Remember, while having quality equipment is important, it’s your creativity, skills, and understanding of lighting and composition that truly make a difference in food photography. Experiment, learn, and develop your own unique style and techniques to capture beautiful and appetizing images of food.
5 pro-level food photography tips

1. Master Lighting Techniques
Lighting is crucial in food photography for setting the mood and highlighting the textures and colours of the food. Experiment with different types of lighting, such as natural light, diffused light, or artificial light setups. Utilize reflectors to bounce light and reduce shadows. Understanding how to control and manipulate light will take your food photography to a pro level.
2. Pay Attention to Composition
Composition plays a vital role in capturing eye-catching food images. Use the rule of thirds to create a visually pleasing balance. Consider the placement of the main subject, props, and negative space. Experiment with different angles and perspectives to capture the food from its most enticing angles.
3. Focus on the Details
Capture the intricate details and textures of the food to make it come alive in the photograph. Use a macro lens to get up close and bring out the smallest details. Whether it’s capturing the steam rising from a freshly cooked dish or the delicate layers of a cake, paying attention to the finer details adds depth and interest to your images.
4. Utilize Props and Styling
Props and styling can elevate your food photography from ordinary to extraordinary. Choose props that complement the food and enhance the overall composition. Consider the color, texture, and size of the props to create a cohesive visual story. Experiment with different types of backgrounds and surfaces, such as rustic wooden boards or elegant marble slabs, to add depth and character to your images.
5. Edit with Precision
Editing is a crucial step in achieving a professional look for your food photographs. Use photo editing software like Lightroom or Photoshop to fine-tune your images. Adjust colors, exposure, sharpness, and contrast to enhance the visual appeal of your photos. Avoid over-editing, as maintaining a natural and realistic look is key.
Remember, practice makes perfect. Keep pushing boundaries, experimenting with new techniques, and refining your skills. With time and dedication, you’ll be capturing pro-level food photographs that showcase the beauty and deliciousness of your culinary creations.
Achieving Professional Food Photography Photos

Professional food photography goes beyond simply snapping a quick picture of your meal. It requires careful attention to detail, thoughtful composition, expert lighting techniques, and precise styling. In this guide, we will walk you through the essential steps and techniques to help you create captivating food photos that look like they came straight out of a magazine.
Achieving professional-level food photography photos requires a combination of technical skills, artistic vision, and attention to detail.
From selecting high-quality ingredients and understanding lighting principles to styling your dishes and mastering post-processing, we will explore every aspect of the food photography process. Follow along as we delve into the world of professional food photography and provide you with the knowledge and skills to capture images that truly showcase the beauty, textures, and flavours of your culinary creations. So, let’s grab our cameras, prepare to get creative, and embark on this journey to achieve professional-level food photography
Here are some tips to help you capture stunning images:
Plan Your Shoot
Before you start photographing, plan the details of your shoot. Consider the concept, props, colours, and composition you want to achieve. Visualize the final result and gather all the necessary ingredients and tools.
Quality Ingredients and Freshness
Use fresh, high-quality ingredients that are visually appealing and showcase the natural colours and textures of the food. Select ripe fruits, vibrant vegetables, and well-prepared dishes to create a strong foundation for your photos.
Lighting is Key
Understand and control lighting to create the desired atmosphere and highlight the food’s best features. Natural light is often preferred for its softness and ability to bring out the food’s natural colours. Position your food near a large window or use diffusers and reflectors to soften and manipulate the light. Avoid harsh overhead lighting that can create unflattering shadows.
Styling and Composition
Pay attention to styling and composition to create visually captivating images. Consider the rule of thirds, leading lines, and negative space to create balance and draw the viewer’s eye to the main subject. Experiment with different angles, perspectives, and focal points to add depth and interest to your photos.
Props and Backgrounds
Select props and backgrounds that complement and enhance the food’s aesthetics. Experiment with different textures, colours, and materials to create a cohesive and visually pleasing scene. Keep in mind that the props should not overpower the food; they should support and enhance the overall composition.
Attention to Detail
Pay attention to the smallest details in your shot. Clean up any spills or unnecessary distractions. Use food styling tools like tweezers or brushes to arrange garnishes or adjust the placement of ingredients. Consider adding steam, drips, or condiments to create visual interest and make the food appear more enticing and realistic.
Post-processing
Editing is the final touch in achieving a professional look. Use photo editing software to adjust exposure, white balance, colour saturation, and sharpness. Aim for a natural and vibrant look that enhances the food’s appeal without appearing artificial. Remember to preserve the integrity of the dish and avoid excessive editing.
Practice and Experiment
Professional food photography takes practice and experimentation. Try different techniques, lighting setups, and compositions. Analyze and learn from your own photos, as well as from experienced food photographers. Continuously refine your skills and adapt to personal style and preferences.
By applying these tips, practising, and consistently honing your skills, you can achieve professional-level food photography photos that capture the beauty and deliciousness of the food you’re showcasing.
Final words
As we conclude this guide on achieving professional food photography photos, we hope that you now feel equipped with the knowledge and tools to capture stunning images that showcase the beauty and deliciousness of the culinary world. Remember, professional-level food photography requires a combination of technical skills, artistic vision, and attention to detail.
Practice, experimentation, and continuous learning will be key to refining your skills and developing your own unique style in this creative field. Embrace the process, be open to trying new techniques, and don’t be afraid to think outside the box. Each photoshoot is an opportunity to grow and improve.
Always aim to highlight the unique qualities of the food, its textures, and colors. Pay close attention to lighting, composition, styling, and post-processing to create images that truly captivate the viewer’s imagination and evoke their senses.